How to Create a free website on WordPress:
First check out my WordPress website- cricketguru.xyz
Before You Start, Read This:
There are hundreds of different website building platforms and website builders around the market.
WordPress, Wix, Joomla, Drupal… Just to name a few.
You can also code your website from scratch, but I wouldn’t recommend it on mainly two reasons:
- It just takes too much time (seriously)
- Your end result will be mediocre at its best…
But which one should you choose?
Let’s take a look at these recent statistics made by BuiltWith.
How People Build Websites in 2019
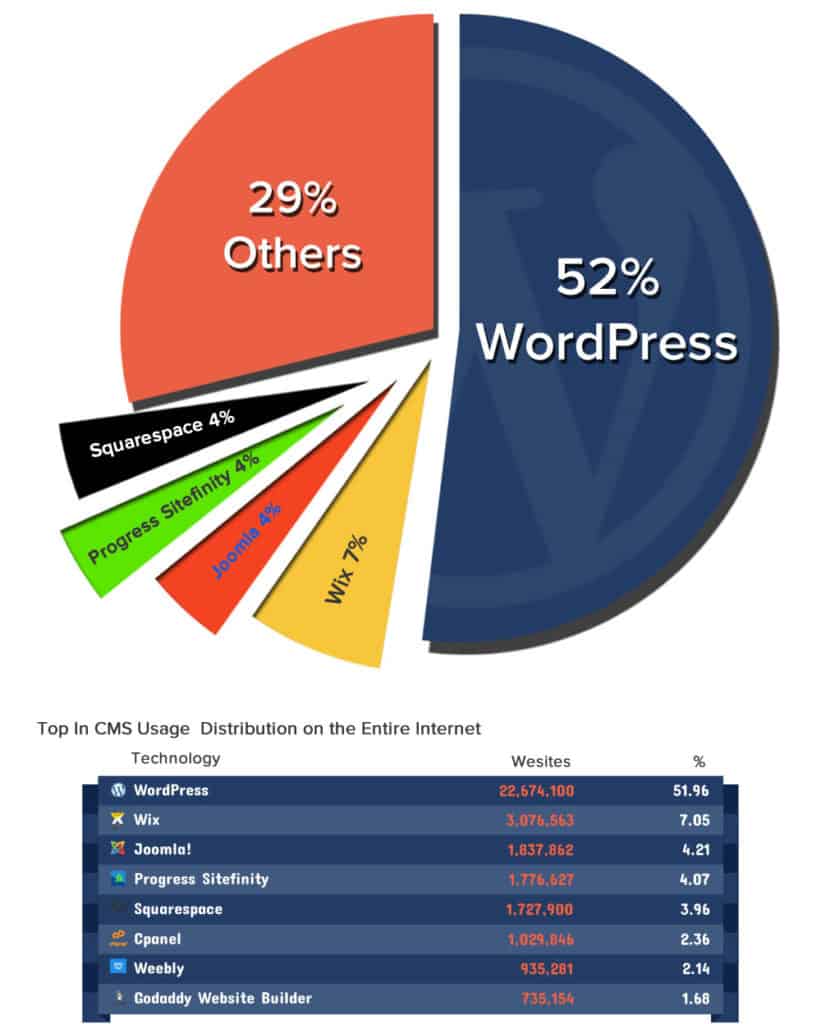
As you can see from the graph above, in 2019, the most popular website builders (or content management systems) are:
- WordPress (free) 52%
- Wix (paid) 7%
- Joomla (free) 4%
- Progress Sitefinity (free) 4%
- SquareSpace (paid) 4%
- Weebly (paid) 2%
Step 1: Signup to WordPress.com
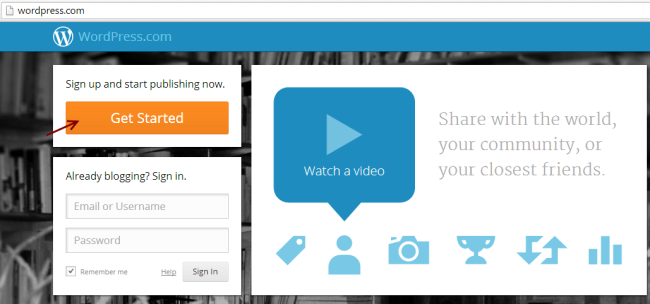
First you need to signup at WordPress.com so go to http://wordpress.com/ you would find a screen like the below one. Click onGet Started. You would be redirected to a signup page.
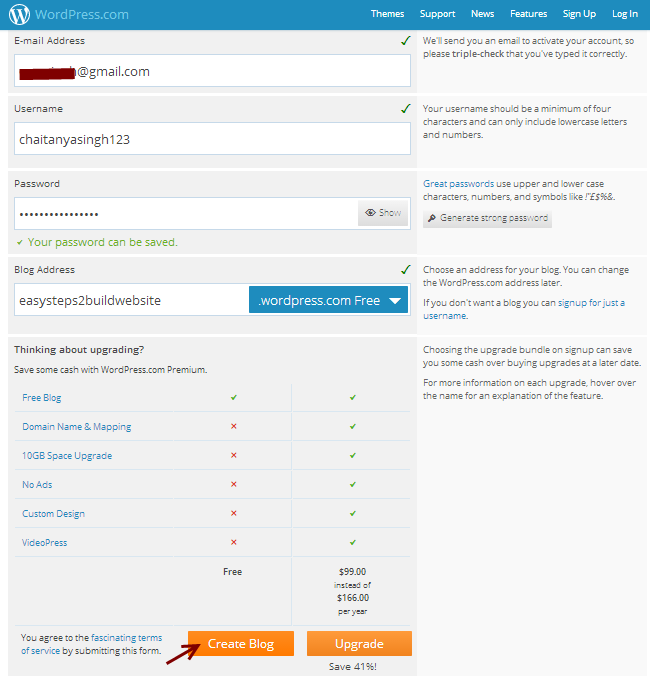
Fill out the signup form. The fields you must need to provide are E-mail Address, Username, Password and Blog Address (Domain name). Click on Create Blog!
There are few things which you must know – The domain name you choose would be suffixed with WordPress.com (since you are using WordPress platform for creating free website), for example I choose a blog name as easysteps2buildwebsite and it has automatically been suffixed with wordpress.com so my complete domain name (Website’s address) is easysteps2buildwebsite.wordpress.com.
Step 2: Confirm email and Activate Blog
Once you are done with step 1, you would be able to see a screen like the below one, which will ask you to confirm your E-mail Address.

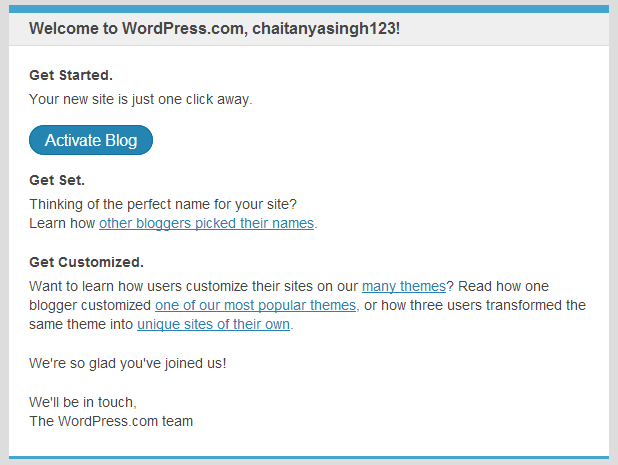
Head over to your email and Click on Activate Blog! in order to confirm the Address. The email you get would look like the one shown below.
Step 3: Setup your blog
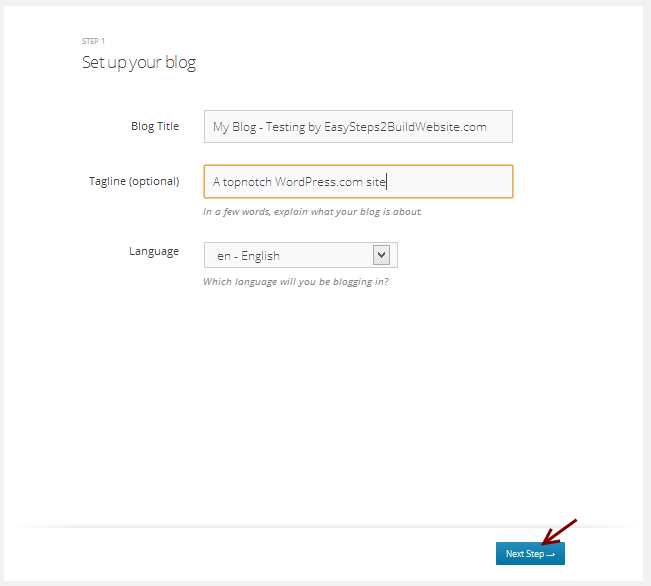
Once you are done with step 2, you would be asked for the few details about your new website such as blog Title, tagline and Language. Click on Next Step after filling up all these details.
Step 4: Choose and Customize WordPress theme
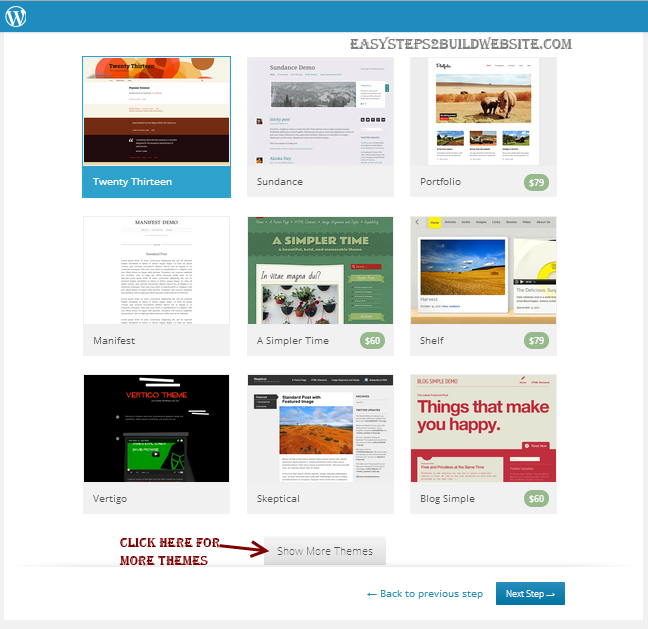
In this step you must need to choose a theme for your website. There you would find free and premium themes both. Choose any of the free theme, select it and head over to the next step.You can also browse more free themes at http://theme.wordpress.com/themes/sort/free/.
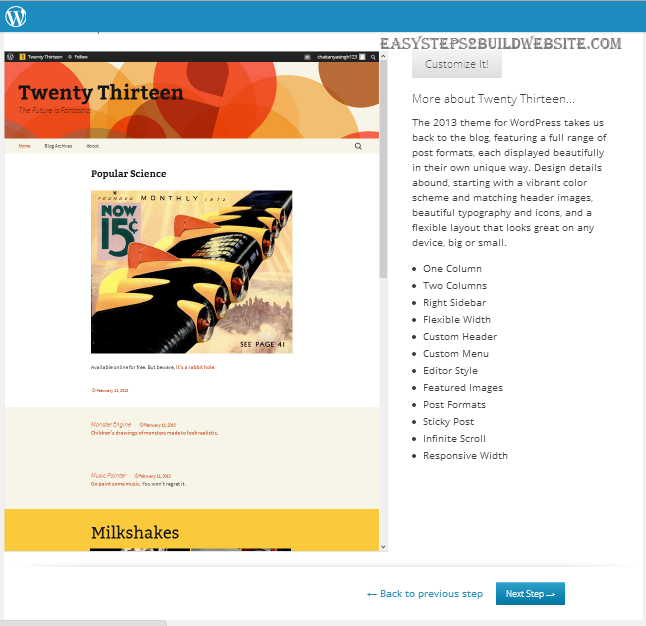
Customize the theme if you want otherwise click Next Step
Step 5: Connect with Facebook or Twitter
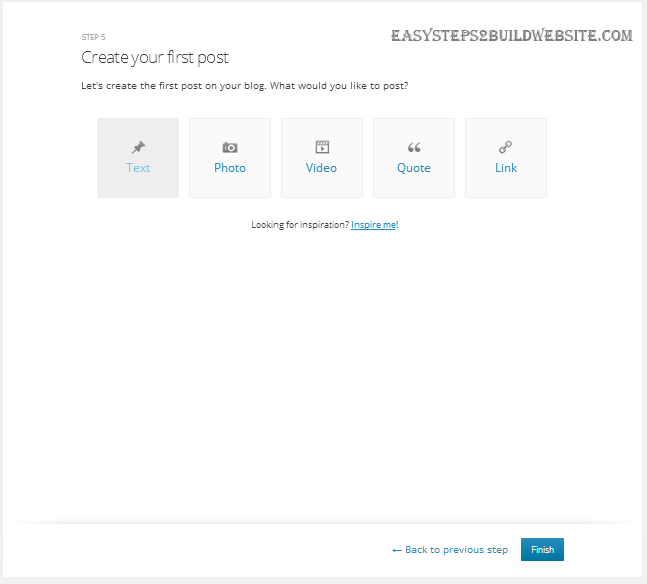
You may choose to configure your twitter and Facebook accounts here. You can also skip this step and go to next step. You would be able to configure these items later.

Step 6: Finish the Process
Click Finish! You have successfully created a free website on WordPress. It’s time to check how the website looks.
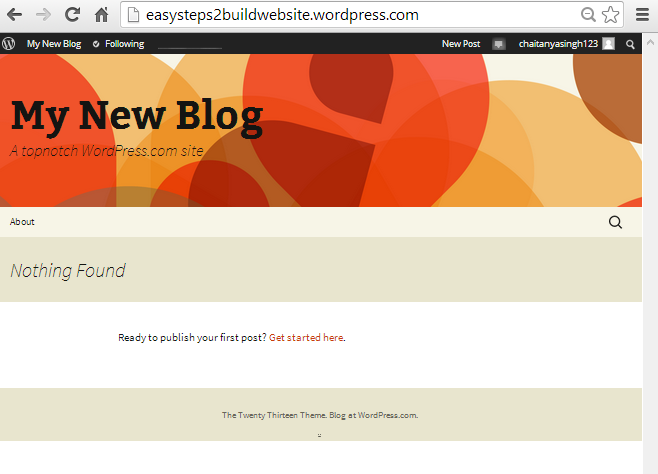
Step 7: Visit your newly created Website
Go to the browser and give your complete domain name (Website’s URL). You would be able to view your website. Cool huh! The whole process took just couple of minutes to setup everything. Wait!! We are not yet finished, it’s just the beginning, you would need to change the look and appearance of your website to make it look attractive. You can do so by referring the next section.
Change the Appearance
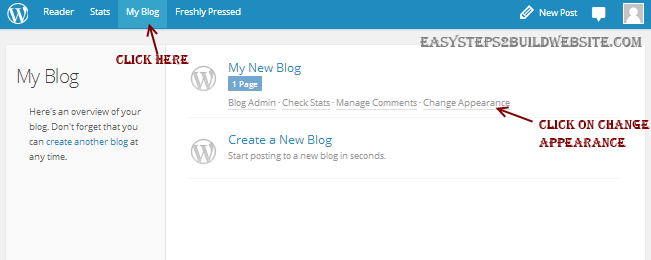
In order to change the appearance of your newly created website. Click on My Blog at the menu bar and then click on Change Appearance. Refer the below snapshot for the same.
You would find the below screen. This is your WordPress Dashboard, you can do lot more things using the left sidebar. We are on the Appearance tab in the left sidebar which allows you to customize existing theme and switch between new themes. Are you able to see the left black sidebar? let me cover few basic things about the sidebar before I finish this tutorial.
- Dashboard: For WordPress, Plugins and Themes updates.
- Posts: For editing, deleting and writing new posts.
- Media: For managing and uploading new media files such as images and videos
- Pages: For Managing and creating new pages on your Blog.
- Comments: For Moderating comments – Here you can approve, delete and reply to the comments.
- Appearance: We already covered it earlier – for trying out new themes and customization.
- Settings: Lot more things to do. Go through the settings and configure them as per the need.


Comment Policy : The owner of this blog reserves the right to edit or delete any comments submitted to the blog without notice. This comment policy is subject to change at any time. If you have any questions on the commenting policy, please let us know at [blog contact information]..