Moving your WordPress site to a new host can be a bit stressful. If it’s not done properly, it can result in some annoying and unexpected errors. However, if it’s handled correctly, it should be a stress free experience.
In this tutorial, I’ll demonstrate how to migrate a WordPress site to a new host and domain name, avoiding many of the common problems experienced with migrations.
Note: There are many ways to approach a migration, in this tutorial I’ll be introducing you to a manual approach. It’s not always the easiest option, but once you understand how it works, you’ll be better equipped to tackle any problems you come across when moving sites. If you’re looking for a plugin to use to migrate, try this article that runs through five useful plugins for WordPress backup and migration, but keep in mind that understanding the manual approach presented here will help you considerably when using those.
Deactivate All Plugins
Before you begin, I’d recommend that you deactivate all plugins because, when moving a WordPress site to a new host, the things that are likely to fail are your WordPress plugins. WordPress itself is well designed to adapt to new changes, but the plugins might not be.
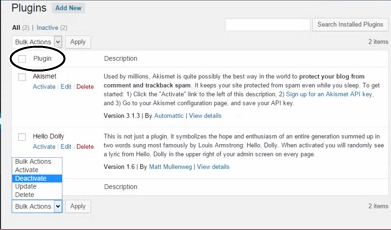
Therefore, to deactivate all activated plugins, go to the admin page -> Plugins -> Installed Plugins -> Mark all -> Bulk action -> Deactivate -> Apply

It’s best practice to always backup your website before making any changes, and a WordPress migration is no exception. There are a couple of WordPress plugins for doing this, but a manual approach is best if you want to be in complete control of the process.
Now, I’ll show you how to backup your WordPress files and database with a manual approach, and also via a plugin.
Backing up Manually
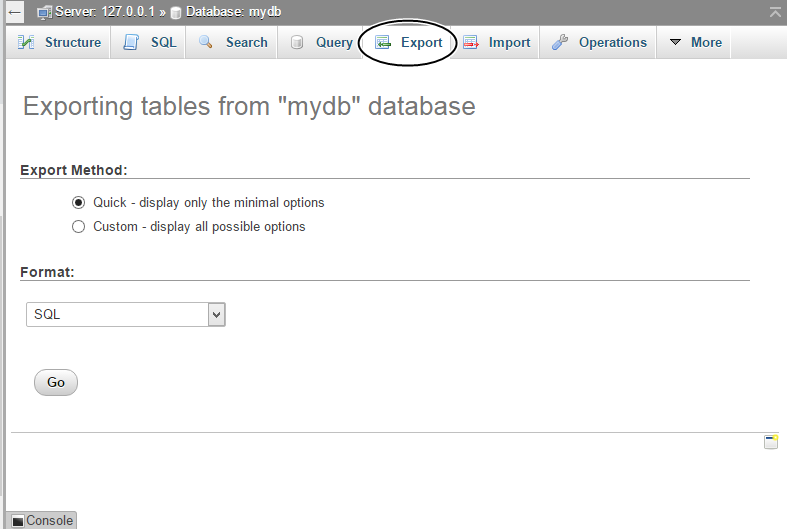
To back up your WordPress database manually: Log in to your phpMyAdmin, click on your WordPress database and select Export as shown in the image below.

Ensure that you’re exporting in SQL Format and click Go. Your WordPress database will then be downloaded as a .sql file. I recommend that you save the downloaded SQL file to a special folder on your computer so that you can easily locate it later. You can also use the command line to export a copy of your database, you can find more information on that here.
To backup your files manually: I would recommend that you download your complete WordPress installation folder so that you won’t lose anything.
Using any FTP/SFTP client like FileZilla, log in to your host by FTP/SFTP and download your htdocs or public_html folder (or anywhere your WordPress installation resides).
Backing up with a Plugin
Download and install the UpdraftsPlus Backup and Restoration plugin. At the Installed Plugins page, locate the UpdraftsPlus plugin and activate it.
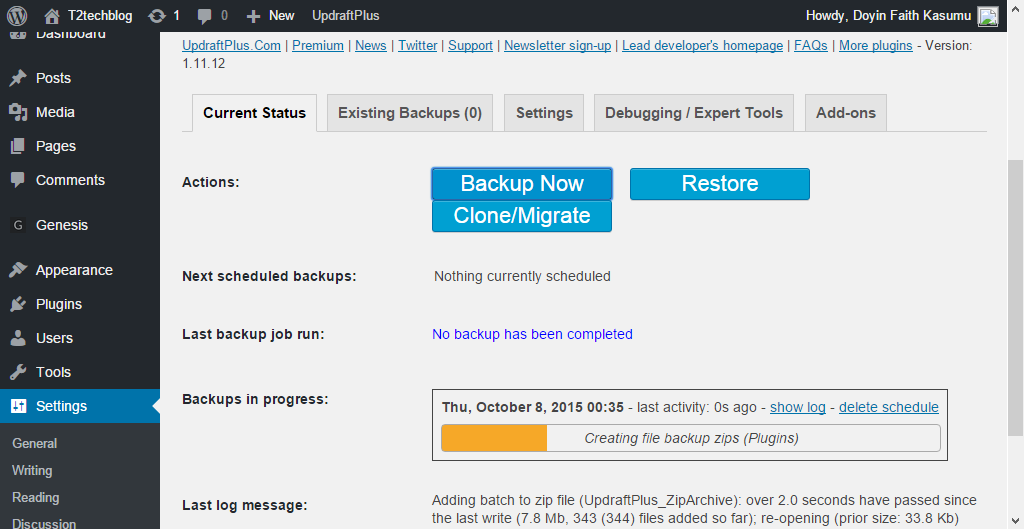
Once you have the plugin installed, at the admin page, go to Settings -> UpdraftsPlus Backups, and then click the Backup.

This might take a while depending on the size of your WordPress site, but once the process has been completed, click on the Exisiting Backups tab to download the backup to your computer and then you can move it to a special folder too.
Preparing Your Backup for Upload
Now that we have the backup, we need to modify a few things before we can move on to uploading our backup(s). Before proceeding, log in to phpMyAdmin of your new host and create a new database. Note down the name of the database, as you will be needing it later in this tutorial.
Updating the wp-config.php file
There is some information to be modified in our WordPress configuration file before moving on. Extract the ZIP archive of the WordPress installation folder you downloaded earlier, locate the wp-config.php file and open it for editing using your favorite text editor such as Notepad and Notepad++.
Edit the lines below, replace with the details of your new host and save.
We’re almost done. The next action to take is to upload your modified WordPress installation folder to the new host via FTP/SFTP.
After uploading is completed, proceed to upload your database backup.
To upload the database backup, log in to your phpMyAdmin in your new host and click the Import menu as shown below.
Select the SQL database backup and upload.
There are several ways to set your URL for WordPress, we’ll discuss a few common methods.
If you’re moving to a new domain too, ensure you have successfully pointed your new domain to your hosting account (refer to your hosting support documentation for the exact details).
Using wp-config.php
You can set your URLs by adding the following lines to wp-config.php, this overrides and will disable these options in the WordPress dashboard.
define('WP_HOME','http://example.com');
define('WP_SITEURL','http://example.com');
The WordPress Codex has a good explanation of this.
Using a WordPress Theme functions.php File
Paste the below lines in your active theme’s functions.php file immediately after the initial line, using the editor provided by an online FTP/SFTP client, or your preferred text editor.
update_option ( 'siteurl', 'http://your_new_domain_name.com' );
update_option ( 'home', 'http://your_new_domain_name.com' );
Replace the http://your_new_domain_name.com with your new domain URL. The above code will automatically update the siteurl home option names with your new blog URL in the database. Visit your WordPress login or admin page and your site should work.
Once your site is back up, ensure that you delete the lines you added to your theme’s function.php file to prevent the updating each time your site is viewed.
Manually Updating the WordPress Home URL and Site URL
To manually update your WordPress Home URL and Site URL, login back to your phpMyAdmin, open your WordPress database, click on the wp_options table and modify the values of the site_url and home column with your new URL.

Now that everything is working fine, go ahead and activate your necessary plugins. To do that, navigate to Plugins -> installed plugins, select activate from the Bulk action drop down and hit the Apply button.
To update your permalinks, go to Settings -> Permalinks, select your desired permalinks structure and Save Changes.
301 Redirection Setup
To transfer your old domains SEO juice (or SEO value) to the new one, it’s important that you set up a 301 redirect as follows.
Open the .htaccess file in your old WordPress install folder and append the rewrite rules below so that anyone visiting your site using your old domain URL will be redirected to the new domain.
@technicalhelpcenter


Comment Policy : The owner of this blog reserves the right to edit or delete any comments submitted to the blog without notice. This comment policy is subject to change at any time. If you have any questions on the commenting policy, please let us know at [blog contact information]..